
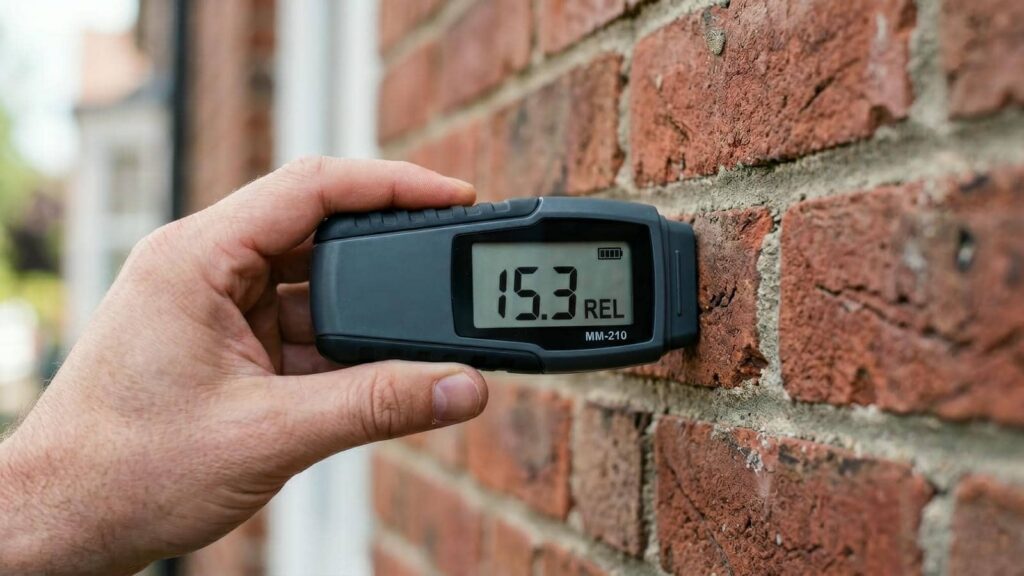
A hidden wall leak can turn a small problem into a costly failure before you notice it. You can catch it early by watching for cool spots, musty odors, peeling paint, dark stains, and soft drywall, then confirming your suspicion with a moisture meter or thermal scan. If the readings climb or the damage spreads, you’ll need to know what’s happening behind the surface next.
Key Takeaways
- Look for signs like musty odors, peeling paint, bubbling wallpaper, swelling trim, or cool wall spots.
- Compare wall temperatures and sound by tapping; hollow or soft areas can indicate hidden moisture.
- Use a moisture meter and hygrometer to scan suspect areas and compare readings with dry walls.
- Trace stains, mold, or efflorescence around corners, baseboards, and seams to locate leak sources.
- Use thermal imaging or call a water damage professional if moisture readings stay elevated or damage persists.
Signs of Hidden Wall Moisture
If you suspect hidden wall moisture, you’ll often notice subtle warning signs before any visible water appears. You may feel a cooler wall section, hear faint crackling, or detect a musty odor that lingers after ventilation.
Paint can bubble, seams can lift, and trim may swell where moisture collects behind the surface. In drywall, discoloration often starts as a pale shadow, then darkens as damp insulation holds water longer than it should.
Pay attention to recurring condensation near plumbing chases, exterior corners, or rooms with active humidity sources. These patterns suggest moisture isn’t random; it’s entering or condensing in a specific wall assembly.
When you recognize these signals early, you join the group of homeowners who catch problems before they spread and weaken structure.
Check Wall Moisture With Simple Clues
Start with the simplest clues: a hygrometer, a moisture meter, and your senses.
During visual inspection, you should look for moisture indicators such as darkened paint, swollen trim, peeling wallpaper, and fine cracks near seams.
Run your hand along cool wall areas; damp plaster often feels denser and less stable.
Listen for a hollow or soft sound when you tap lightly, since trapped moisture can change wall response.
You can also notice musty odors, especially near baseboards, corners, and window frames.
Check after rain or in high-humidity periods, when small changes become clearer.
If several moisture indicators cluster in one zone, you’re likely seeing a developing issue.
Trust careful observation, not guesswork, and document each clue so your group can compare patterns and act together.
Use a Moisture Meter on Walls
You can use a pin or pinless moisture meter to measure wall conditions beyond what your eyes can confirm.
Move the meter methodically across suspect areas, keeping the sensor flat and covering seams, corners, and stained zones.
Compare the readings to a known dry area, since elevated values indicate where moisture may be trapped inside the wall.
Meter Types and Uses
When hidden moisture is a concern, a moisture meter gives you a fast, quantitative check of wall conditions before damage becomes obvious.
You’ll usually choose between pin and pinless moisture meter types. Pin meters read resistance through probes, so you can compare exact spots and confirm suspicious readings. Pinless meters use electromagnetic scanning, letting you survey larger wall areas without leaving marks.
For either tool, meter accuracy depends on calibration, material density, and proper contact. You should trust the pattern, not a single number: look for readings that stay elevated in the same zone and match visible clues like staining or soft drywall.
Used well, the right meter helps you join the ranks of homeowners who catch hidden leaks early and act with confidence.
Proper Wall Scanning
Move the moisture meter in a deliberate grid across the wall, keeping each pass consistent so the readings reflect actual conditions rather than scan technique. You’ll get cleaner coverage when you hold the probe flat, move slowly, and overlap each path slightly.
Good wall scanning techniques help you feel confident, like you’re working with the same precision as other skilled inspectors. Use moisture detection tools on drywall seams, corners, baseboards, and around openings, where hidden dampness often gathers.
Stay steady and trace the whole surface, not just obvious spots.
- Mark your start point.
- Scan in even rows.
- Return to missed areas.
Reading Moisture Levels
Once you’ve scanned the wall in a steady grid, check the meter’s readings against the surrounding surface to spot abnormal moisture patterns.
You should compare each value with nearby dry areas, because hidden leaks often appear as small but consistent spikes. Track how quickly the numbers rise in zones with higher moisture absorption, especially near baseboards, windows, and pipe runs.
If the meter stays elevated after the room’s humidity levels stabilize, treat that section as suspect. You’re not looking for one isolated number; you’re looking for a pattern your team can trust.
Mark every change, then revisit the same spots later to confirm whether the readings persist or drift back to normal. This method helps you identify problems early and stay confident in your inspection.
Find Hidden Leaks Behind Paint and Drywall
You can spot hidden leaks behind paint and drywall by watching for visual moisture clues such as staining, blistering, and localized swelling.
When the surface looks normal, you can use thermal imaging to detect temperature anomalies that often indicate trapped moisture.
Then you can trace the pattern back to the source and pinpoint the leak before it spreads.
Visual Moisture Clues
When moisture hides behind paint or drywall, it often leaves visual traces before any leak becomes obvious. During wall inspection, you can spot early moisture detection cues if you look closely and trust your observations.
Watch for subtle discoloration, bubbling paint, and soft, swollen drywall edges. You’re not alone in missing these signs at first; they often blend into everyday wear.
Staining: Brown, yellow, or dark rings usually mark repeated wetting.
Texture changes: Peeling paint, blistering, or warped joints suggest trapped moisture.
Mold or efflorescence: Fuzzy growth or white crystalline deposits point to persistent dampness.
Check baseboards, ceiling corners, and around windows with a methodical eye. When you notice a pattern, act quickly, because hidden moisture rarely stays isolated.
Thermal Imaging Tools
Thermal imaging gives you a fast way to locate hidden moisture by showing temperature differences behind paint and drywall. You scan the wall surface and watch for cool zones that often signal moisture detection issues.
Because wet materials usually hold and release heat differently, thermal imaging helps you see patterns you’d miss with the naked eye. Use it in stable indoor conditions, with minimal direct sunlight and limited HVAC drafts, so the image stays readable.
Compare suspect areas with nearby dry sections to judge whether the anomaly is real. You’re not guessing alone; you’re using a precise tool that helps you feel confident in your inspection and connected to the process.
Record the image, note the location, and move carefully through the room.
Pinpoint Leak Sources
After thermal imaging flags a suspicious cool zone, narrow the source by checking the surrounding wall assembly for the most likely entry point.
In leak detection, you’ll trace stains, bubbling paint, softened trim, and rusted fasteners to the path water prefers. Moisture mapping helps you compare readings across studs, corners, and baseboards, so you can separate a true leak from surface condensation.
Work outward from the wettest point and inspect:
- Plumbing penetrations under sinks, behind showers, and near supply lines.
- Window and door flashing where sealant has cracked or separated.
- Roof or exterior wall connections, including vents, joints, and siding gaps.
When you log each reading, you’ll build a clearer repair plan and feel confident you’re solving the right problem.
Spot Mold, Stains, and Soft Spots
Mold, discoloration, and softened drywall often provide the clearest visual clues that moisture is trapped inside a wall. You should inspect corners, baseboards, and seams for patchy staining, bubbling paint, or dark fuzzy colonies that signal mold growth.
Press gently on suspect areas; if the surface gives way, crumbles, or feels spongy, moisture has likely weakened the wallboard. Look for musty odors too, because they often confirm what your eyes can’t see.
Trace stains upward and outward to map the affected zone, then note recurring marks that suggest chronic seepage. When you identify these signs early, you can act together with your household on moisture prevention, limiting hidden damage and keeping your shared space healthier, safer, and more consistent.
Check Wall Moisture After Water Damage
If you’ve already spotted stains, soft drywall, or a musty odor, treat the wall as water-damaged and check it promptly for hidden moisture.
Use a meter or thermal scan during your wall inspection, then compare readings around trim, outlets, and baseboards. You’re looking for damp zones that don’t match surrounding dry areas.
Keep notes so you can track changes over time and feel confident in the next step.
- Test several points, not just one.
- Record indoor humidity and recent leak history.
- Recheck after drying to confirm moisture detection.
If readings stay elevated, the wall still holds water, even when the surface looks fine.
That’s common, and it doesn’t mean you’ve missed anything. It means you’re acting with the same care as others who protect their space early.
When to Open the Wall for Inspection
Open the wall only when surface testing, visual inspection, and drying checks still show elevated moisture or an unexplained damp pattern. At that point, your inspection timing should shift from monitoring to verification.
You’ll open the assembly where wall accessibility lets you confirm whether moisture sits in insulation, framing, or backing materials. Choose the smallest practical access point so you can preserve evidence and limit disruption.
If the damp zone tracks beyond the visible stain, inspect adjacent cavities to map the full extent. You’re not guessing; you’re tracing a pattern. Stay methodical, note readings, and compare each section for consistency.
That disciplined approach helps you join the group of owners and technicians who catch hidden damage early and document it clearly.
Dry Wet Walls Fast
Once you’ve confirmed hidden moisture, move quickly to dry the wall before damage spreads. You should create airflow, lower humidity, and remove standing water at the source. Use these drying techniques to protect adjacent materials and limit swelling, staining, and odor.
Stay methodical so you’re working like the rest of a careful home care team.
- Open windows when outdoor air is drier than indoor air.
- Aim fans across the wall surface, not straight into insulation cavities.
- Run a dehumidifier nearby and check the wall daily.
If the drywall feels cool, soft, or darker than surrounding areas, keep drying until readings stabilize.
Consistent moisture prevention now helps you avoid repeat problems and keeps your space safer, cleaner, and easier to trust.
Call Water Damage Pros
When moisture keeps returning, spreads beyond the drywall, or shows signs of structural damage, you should call a water damage professional right away.
You’ll get a professional assessment that identifies hidden leaks, saturated framing, and compromised insulation before the problem worsens. A trained team uses moisture meters, thermal imaging, and targeted inspections to map the affected area without unnecessary demolition.
That matters because lingering water damage can weaken materials, promote mold growth, and reduce indoor air quality.
When you bring in pros, you’re not acting alone; you’re joining a process designed to restore your space safely and efficiently. Their findings help you choose the right repairs, document the loss, and protect the structure you share with your household.
Frequently Asked Questions
How Often Should Walls Be Checked for Hidden Moisture?
You should check walls at least twice yearly, and after leaks, storms, or plumbing work. Routine wall inspection supports moisture detection, catches hidden damage early, and helps you protect your space together.
Can Humidity Alone Cause Wall Moisture Problems?
Yes, humidity alone can cause wall moisture problems when you have poor ventilation or thermal bridging. You should track humidity sources and apply moisture prevention measures, because excess vapor can condense inside walls and persist unnoticed.
Which Wall Materials Hide Moisture the Longest?
You’d expect concrete to dry fastest, but dense drywall, plaster, and tile-backed assemblies can trap moisture longest. You should use moisture detection because water resistant materials only slow intrusion, not reveal hidden saturation.
Does Hidden Wall Moisture Affect Indoor Air Quality?
Yes, hidden wall moisture can degrade your indoor air quality by driving mold growth and releasing spores, odors, and microbial VOCs. You’ll face health risks, especially if you’re sensitive, and your shared space can feel unsafe.
Can New Paint Trap Moisture Inside Walls?
Yes, you can trap moisture if you choose the wrong paint types or cover damp walls with moisture barriers. You should let walls dry first, then use breathable coatings so you don’t seal in hidden humidity.
Conclusion
When you check walls for hidden moisture, you’re reading quiet clues before they turn into costly damage. Trust cool patches, musty odors, stains, and soft drywall as your early warning system. Use a moisture meter to verify what your eyes suspect, and open the wall only when the evidence points there. Dry the area quickly, keep airflow moving, and call a pro if the problem won’t fade. Don’t let water hide in plain sight.