
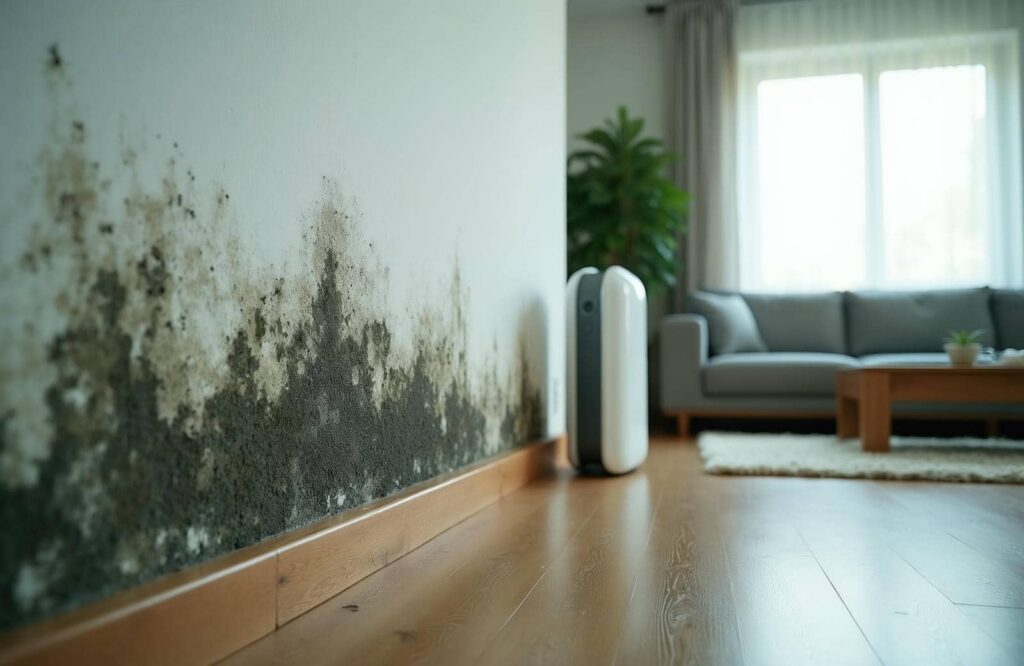
When water damage hits, you need to act fast to keep mold from taking hold. You’ll shut off the source, remove standing water, and dry affected materials within 24 hours. Then you’ll check walls, floors, and hidden cavities for trapped moisture before it spreads. Some areas need extra attention, and some damage needs expert handling—because the next few hours can decide what happens next.
Key Takeaways
- Shut off the water source immediately and call a professional if you cannot stop the leak safely.
- Remove standing water fast using towels, mops, wet/dry vacuums, and squeegees.
- Dry affected areas with fans, open windows, and dehumidifiers to lower moisture quickly.
- Prioritize mold-prone spaces like bathrooms, kitchens, basements, and hidden areas under sinks and behind walls.
- Inspect for damage and mold signs, clean surfaces promptly, and contact professionals if the affected area is large or mold returns.
Stop the Water Source Fast
If you can do only one thing to prevent mold, stop the water source immediately. Shut off the supply valve, close the affected fixture, or call a professional if you can’t isolate the leak safely.
Every minute counts, because moisture feeds growth quickly. Inspect visible plumbing, roofing, and appliance lines, then document the problem so you can make quick repairs without guessing.
If you’re in a shared building, tell your neighbors or manager right away so everyone can act together. You’re not overreacting; you’re protecting your space and the people in it.
Stay calm, move decisively, and keep checking for any continued drip, seep, or spray. When you cut off the water source fast, you give your home the best chance to stay dry and healthy.
Remove Standing Water Right Away
Grab towels, a wet/dry vacuum, mops, or a squeegee and remove standing water as soon as possible. Immediate action limits moisture that can migrate into floors, baseboards, and wall cavities, where mold can take hold.
Work methodically from the highest pool to the lowest, and empty the vacuum often so you keep suction strong. If you’re sharing the space with family or neighbors, assign simple tasks so everyone helps move water out fast and safely.
Check corners, under cabinets, and around appliances, because standing water hides in tight spots. Don’t leave puddles behind “for later”; every minute counts.
Dry Wet Materials Within 24 Hours
Dry wet materials within 24 hours to keep moisture from settling into drywall, insulation, carpet padding, and wood.
You should move air across surfaces with fans, open windows when outdoor conditions help, and run dehumidifiers for humidity control.
Pull up damp rugs, lift furniture cushions, and separate items so airflow can reach every side.
Check hidden pockets in corners, under trim, and behind baseboards, because trapped moisture can linger there.
Use ventilation improvement to speed evaporation, but keep the room closed when outside air is damp.
Feel confident: quick drying protects your space and helps your home bounce back.
Monitor progress with a moisture meter or by touch, and keep drying until materials feel fully dry and stable.
Dry Mold-Prone Areas First
Start with the areas that mold can colonize fastest, such as bathrooms, kitchens, laundry rooms, basements, closets, and any space with poor airflow or past leaks.
You’ll slow mold growth by drying these zones first, because they hold moisture longer than open rooms. Use fans, dehumidifiers, and open doors to improve air circulation and remove humid air from corners, shelves, and floor edges.
Check behind stored items, under sinks, and around vents, since trapped dampness can hide there. If your home has several wet spots, move methodically so each priority space gets attention before you shift to less vulnerable areas.
That focused approach protects the shared spaces you live in and helps your household feel back in control sooner.
What to Do With Wet Walls
First, assess how deeply the wall is saturated by checking the surface, trim, and insulation for moisture.
Then dry hidden cavities with airflow and dehumidification so trapped dampness doesn’t keep feeding mold.
If drywall, insulation, or other materials stay damaged or soaked, remove them promptly to prevent further growth.
Assess Wall Saturation
When water has soaked into a wall, you need to gauge how deep the saturation goes before you decide on cleanup or repairs.
Start with moisture measurement at several points, comparing the wet area to nearby dry sections. Check for swelling, discoloration, soft spots, and any loss of wall integrity.
If the surface feels cool or damp beyond the visible stain, the wall may still hold water. Mark the affected boundaries so you can track progress as conditions improve.
You don’t need to panic; you just need a clear read on the damage. Careful assessment helps you choose the right response, protect your space, and keep your team moving together toward a dry, stable result.
Dry Hidden Cavities
If the wall cavity is wet, you’ll need to dry the hidden space as well as the surface, because moisture trapped behind drywall or plaster can drive mold growth even after the stain looks gone.
Open access points, run fans, and use dehumidifiers to move air through the cavity. Check baseboards, outlets, and trim for hidden moisture, but keep power off if water reached wiring.
A cavity inspection with a moisture meter helps you confirm progress and spot pockets that still stay damp.
Set up airflow so dry room air enters one opening and exits another, and keep the area warm if you can.
You’re not alone in this; careful drying now helps protect your home, your health, and your peace of mind.
Remove Damaged Materials
Once the cavity has dried as much as possible, remove any materials that stayed wet long enough to lose their structural integrity or support mold growth. You’ll usually cut out soaked drywall, insulation, and baseboard trim, then inspect framing for staining, soft spots, and musty odor.
Use mold remediation techniques that limit dust and keep adjacent areas protected. Bag debris promptly and follow material disposal guidelines so contaminated scraps don’t spread spores through your home.
- Wear gloves, eye protection, and a respirator.
- Seal the work area before demolition.
- Keep salvageable wood and metal separate.
- Clean tools and surfaces after removal.
You’re not alone in this process; careful removal helps your space recover safely and prepares it for rebuild.
How to Handle Wet Carpets and Padding
If your carpet is soaked, pull it up at the edges, remove it from tack strips, and cut it into manageable sections so you can inspect the pad underneath.
You should remove the padding if it’s saturated, because it holds moisture longer and can trap mold even when the carpet surface looks dry.
Use strong airflow, dehumidification, and direct ventilation to dry the subfloor and any reusable materials as quickly as possible.
Carpet Removal Steps
When carpet has stayed wet for more than a few hours, you should remove it quickly to limit mold growth and protect the subfloor. Cut the carpet into manageable strips, then roll each section away from the room’s center.
Wear gloves and a mask, and keep your footing steady so you stay safe and in control. Separate the padding from the tack strips, then inspect the backing for tears or dark staining.
If you’re weighing carpet replacement options, document what you remove before you decide. Avoid using carpet cleaning techniques as a substitute for removal when saturation is heavy.
- Lift edges gently to reduce damage
- Bag debris to keep fibers contained
- Label sections for easier assessment
- Share updates with your cleanup team
Drying Pad Quickly
After you remove the carpet, pull the padding up right away so it can start drying and won’t keep feeding moisture into the subfloor.
Lay the pad flat in a dry, ventilated area, and lift edges to expose trapped water. Use fans, dehumidifiers, and open pathways for airflow; these drying techniques speed evaporation and reduce hidden dampness.
If the pad is foam, blot both sides with clean towels before you move it.
Check the subfloor for wet spots and clean them promptly to support moisture control.
Replace padding that feels slimy, smells musty, or stays saturated after a few hours.
You’re not handling this alone; quick, steady action helps your space recover and lowers mold risk for everyone in the home.
Find Hidden Moisture in Floors and Walls
Start with a careful moisture check in the areas most likely to stay damp, such as baseboards, flooring seams, drywall edges, and around plumbing penetrations. Use moisture detection tools to compare readings across rooms, and focus on hidden leaks that can trap water behind finished surfaces.
You’re not alone in this step; a methodical sweep helps you protect your space before mold takes hold.
- Probe suspicious spots twice to confirm elevated readings.
- Mark wet zones so you can track progress.
- Check cooler wall sections, where evaporation slows.
- Reinspect after airflow improves to catch rebound moisture.
If a board feels soft or a wall reading stays high, keep drying and monitor closely. Consistent checks give you confidence and keep your home on the right path.
Clean and Disinfect Water-Damaged Surfaces
Remove any contaminated residue from water-damaged surfaces with detergent and clean water, then dry the area thoroughly.
After cleaning, disinfect the surface with a safe solution that matches the material and the contamination level.
You’ll reduce mold risk fastest when you clean promptly, use proper ventilation, and keep the surface dry.
Remove Contaminated Residue
Once standing water is gone, you need to clear away any contaminated residue from water-damaged surfaces as quickly as possible to limit mold growth.
Scrub off mud, silt, and debris with a damp cloth or sponge, working from the cleanest area toward the dirtiest. Keep each pass deliberate so you don’t spread grime into hidden seams or corners. This step lowers health risks and helps your space feel safe again.
- Wear gloves and eye protection.
- Bag and remove loosened waste right away.
- Rinse tools often to avoid recontamination.
- Inspect baseboards, trim, and cracks closely.
You’re not alone in this process; steady cleanup protects your home and supports everyone in it.
Disinfect With Safe Solutions
Disinfection is the next protective step after cleanup: you’ll wash water-damaged surfaces with a safe cleaning solution, then apply an appropriate disinfectant to help reduce remaining bacteria, viruses, and mold spores.
Focus on hard, nonporous materials first, since porous items often need removal. Keep the area ventilated, wear gloves, and follow label directions for contact time so the product can work fully.
If you prefer natural disinfectants, choose options proven for the surface and contamination level, but don’t assume every home remedy is enough. You’re not doing this alone; this step helps protect your space for everyone who lives there.
After treatment, dry surfaces completely, because moisture invites regrowth. If odors, staining, or soft materials persist, bring in a qualified remediation professional promptly.
Watch for Early Mold Warning Signs
How can you catch mold before it spreads? Check damp areas daily after water damage, because early mold growth often starts in hidden corners, behind baseboards, or under flooring.
You may notice a musty odor, discoloration, peeling paint, or condensation that lingers. These warning signs matter because they can signal health risks and moisture that still needs attention. Stay calm; you’re not alone in this.
- Inspect walls, ceilings, and cabinets for spots.
- Feel for soft, swollen, or cool surfaces.
- Watch for recurring humidity after drying.
- Track any allergy-like symptoms near wet rooms.
If you spot these clues, act quickly to keep mold from gaining a foothold and protect your home’s air quality.
When to Call a Mold Removal Pro
Call a mold removal pro when the affected area is larger than about 10 square feet, when mold keeps returning after cleanup, or when water damage has soaked drywall, insulation, or subflooring.
You’ll protect your space faster with a mold inspection that checks hidden cavities, moisture levels, and contamination spread. A professional assessment matters when you smell musty odors, see warped materials, or suspect HVAC involvement, because these signs often mean the problem runs deeper than surface growth.
You don’t have to tackle this alone; trained crews use containment, filtration, and source control to limit spores and restore safe conditions.
Acting early helps you stay in control, reduce repair costs, and get your home back to a healthy place where everyone feels comfortable again.
Frequently Asked Questions
How Do I Tell if Water Damage Is From Clean or Contaminated Water?
You can tell by checking water sources and contamination signs: clean water comes from supply lines, while sewage, floodwater, or runoff often smells bad, looks cloudy, or leaves residue. When unsure, treat it as contaminated.
Should I Turn off Electricity Before Starting Cleanup?
Yes—you should turn off electricity before cleanup. Damp floors and live wiring create electrical hazards. Take safety precautions first, then work calmly and confidently; you’re protecting your space and everyone in it.
Can I Use Fans if the Weather Is Very Humid?
You can use fans, but they won’t dry much in very humid weather; humidity impact lowers fan efficiency. You’ll do better with dehumidifiers, open airflow, and steady monitoring so your cleanup team stays confident.
Is It Safe to Stay in the Home During Drying?
Yes, you can usually stay home if you keep areas ventilated, dry quickly, and monitor mold symptoms. If drying duration exceeds 24-48 hours or you smell mildew, leave until professionals confirm it’s safe.
What Supplies Should I Keep in a Mold Emergency Kit?
You should keep gloves, N95 respirators, goggles, plastic sheeting, trash bags, detergent, scrub brushes, towels, a dehumidifier, and moisture meters for mold removal and moisture control, so you’re prepared, protected, and never facing it alone.
Summary
Act fast, because mold loves a free all-inclusive resort. Stop the leak, pull out standing water, and dry everything within 24 hours with fans and dehumidifiers. Give extra attention to bathrooms, basements, walls, and hidden damp spots, since mold is annoyingly efficient. Clean damaged surfaces, watch for early growth, and call a pro if the mess is widespread or keeps returning. Your home’s not trying to become a science project.