
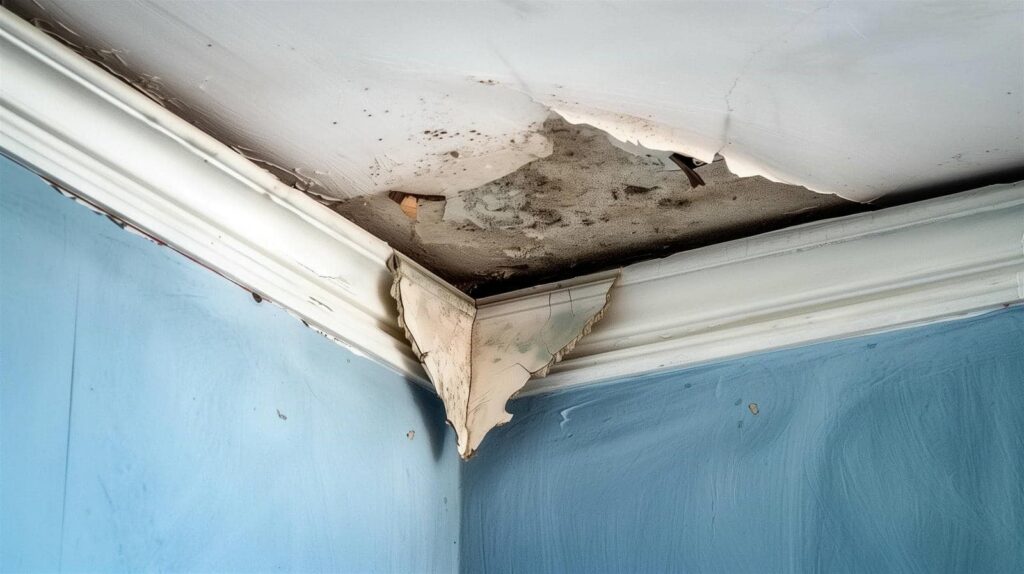
When water damage hits, you need to act fast and in the right order. You’ll first stop the source, then remove standing water, dry hidden moisture, and assess what can be saved. The real difference often comes from the details you can’t see yet: trapped dampness, damaged materials, and early mold risk. The next steps can protect both your property and your health.
Key Takeaways
- Shut off the water source and electricity immediately to stop further damage and stay safe.
- Remove standing water fast using pumps, wet vacs, towels, or mops, starting in the deepest areas.
- Dry affected spaces thoroughly with fans, dehumidifiers, and moisture monitoring to prevent hidden damage.
- Clean and sanitize surfaces, and discard materials that cannot be salvaged to reduce mold risk.
- Choose a certified restoration team with fast response, proper equipment, and strong customer reviews.
What to Do in the First 30 Minutes
In the first 30 minutes, you need to act fast: shut off the water source if you can do so safely, cut electricity to the affected area, and move valuables, rugs, and electronics out of the water’s path.
Then make an initial assessment of the room: note where water has spread, which materials look saturated, and whether ceilings, walls, or floors show immediate risk.
Use your phone to contact emergency contacts, including your insurer and a trusted restoration professional, so you’re not handling this alone. Photograph damage before you disturb anything further.
Wear gloves and sturdy shoes, and avoid standing water if you can’t confirm power is off. Stay calm, work methodically, and you’ll protect your home and give your cleanup team a clear starting point.
Stop Water Damage at the Source
Once you’ve secured the room and documented the damage, your next move is to stop the water at its source.
Find the water source fast: shut off the nearest fixture valve, then close the main supply if needed. If you can’t identify the problem, use leak detection cues like dripping sounds, wet supply lines, or pressure loss to trace it safely.
For appliance failures, unplug the unit and isolate its inlet line. For plumbing breaks, keep clear of electrical hazards and call a licensed professional if the shutoff won’t turn or the line keeps feeding water.
Acting now protects your home and helps your team stay ahead together. Keep calm, work methodically, and verify the flow has fully stopped before you move on.
Remove Standing Water Quickly
Use a wet/dry vac, mop, towels, or a pump to remove standing water as quickly as possible, starting with the deepest areas and working toward the nearest exit. This water extraction step limits spread, reduces material saturation, and supports your emergency response plan.
You’ll work faster if you empty containers often, keep hoses clear, and move methodically from room to room. Focus on complete removal from low points, corners, and under furniture feet, since trapped water can linger there.
If you’re part of a cleanup team, assign one person to collect and another to transport waste water, so everyone stays coordinated. Acting now helps you regain control, protects the space, and gets you closer to a safe, fully restored home.
Dry Walls, Floors, and Hidden Spaces
You’ll need to dry drywall and flooring surfaces quickly, since trapped moisture can wick into materials and weaken them.
Use targeted airflow, dehumidification, and moisture readings to confirm the wall cavity and subfloor are drying properly.
Don’t overlook hidden spaces like baseboards, wall voids, and under cabinets, because residual moisture there can prolong damage and mold growth.
Drywall Moisture Removal
When water reaches drywall, floors, or concealed cavities, quick moisture removal limits swelling, mold growth, and structural damage.
You should begin with a careful drywall inspection, checking seams, baseboards, and fasteners for soft spots, staining, or sagging. Remove wet trim and any saturated insulation, then create airflow across both sides of the wall surface.
Use dehumidifiers to pull moisture from the room and protect adjacent materials with moisture barriers where needed. If the drywall stays damp, cut out compromised sections cleanly so the remaining wall can dry evenly.
You’re not handling this alone; these steps help your space recover safely and predictably. Monitor moisture with a meter until readings return to normal, then repair surfaces only after the wall feels stable and dry.
Hidden Space Drying
Hidden moisture can linger in wall cavities, under flooring, and inside other concealed spaces long after surface water is gone. You need to target these areas with thermal imaging, moisture meters, and careful inspection so you know where drying still matters.
Once you confirm trapped dampness, you can open access points, remove baseboards if needed, and place air movers and dehumidifiers for controlled airflow management. This helps you dry walls, floors, and hidden voids evenly, instead of sealing in moisture that could lead to swelling, odors, or mold.
You’re not handling this alone; a skilled team uses measured steps to restore your space safely, verify progress, and bring your home back to a dry, stable condition.
Remove Damaged Materials
Start by removing any materials that can’t be fully dried and sanitized, including soaked drywall, insulation, carpet padding, baseboards, and warped flooring. You protect the structure and set up effective restoration techniques when you clear damaged materials quickly.
Use PPE, cut away contaminated sections cleanly, and place debris in sealed bags or approved containers. This step helps your team work as one and limits hidden moisture that can trigger mold.
- Remove porous items first
- Check framing for concealed damage
- Keep edges square for repairs
- Document everything before disposal
You’re not just taking things out; you’re creating a safer, more stable space for the next phase. Move methodically, and you’ll give yourself the best chance at a solid, lasting recovery.
Clean, Disinfect, and Salvage Belongings
With the damaged materials removed, you can focus on salvaging items that can be cleaned and disinfected safely.
Sort belongings by material, then wash hard surfaces with mild detergent and warm water using controlled cleaning techniques. Rinse thoroughly so residue doesn’t interfere with disinfecting agents, and apply the product exactly as labeled to achieve full contact time.
For fabrics, launder in hot water when the care tag allows, then dry completely. Clean electronics only if the manufacturer permits it, and let professionals handle delicate items.
You’re not doing this alone; each careful step helps protect what matters to your home and your routines.
Inspect each item for structural weakness, staining, or persistent odor, and set aside anything that can’t be restored safely after treatment.
Prevent Mold After Water Damage
To prevent mold after water damage, you should start rapid drying immediately with dehumidifiers, air movers, and, if needed, targeted heat.
You’ll want to monitor moisture in walls, floors, and contents with a meter until readings return to safe levels.
Rapid Drying Methods
Rapid drying cuts off mold growth before it can take hold, so you need to remove moisture fast and thoroughly after water damage. You’ll get the best results when you combine dehumidifier efficiency with strong air circulation, because moving dry air across wet surfaces speeds evaporation and helps your equipment work harder for you.
- Place dehumidifiers in the driest path.
- Open internal doors to improve airflow.
- Run fans to move air across materials.
- Remove saturated items that block drying.
Stay focused on the affected zone and keep the setup consistent. When you act quickly and use the right tools, you protect your space, support everyone in it, and make recovery feel controlled, not overwhelming.
Moisture Monitoring Steps
Once the area starts drying, you need to track moisture closely so hidden dampness doesn’t turn into mold. Use moisture detection tools, such as a pin meter or infrared camera, to check walls, baseboards, and flooring each day.
Record readings in the same spots so you can spot trends quickly. Keep indoor humidity control between 30% and 50% with a dehumidifier and good ventilation.
If readings stall or rise, inspect behind trim, under cabinets, and inside cavities for trapped water. Replace or dry any materials that stay above safe limits.
You’re not managing this alone; careful monitoring keeps your space safer and helps your cleanup team act before damage spreads.
Frequently Asked Questions
How Much Does Professional Water Damage Cleanup Typically Cost?
You’ll typically pay $1,000-$4,000 for professional water damage cleanup, though cost factors like severity, square footage, and cleanup methods can raise it. You’re not alone; reliable crews assess quickly and restore safely.
Does Insurance Cover All Types of Water Damage Cleanup?
No, insurance doesn’t cover every water damage cleanup; it’s like a filter. You’ll need to check your insurance policies, because coverage depends on water damage types, cause, and exclusions, but you’re not alone here.
How Long Does Water Damage Restoration Usually Take?
Usually, you’ll need three to seven days for drying and minor repairs, while severe losses can take weeks. Your restoration timeline depends on damage extent, drying techniques, and how quickly you start.
Can I Stay in My Home During the Cleanup Process?
Yes, you can sometimes stay home, but you should assess water safety first. Follow cleanup tips, isolate affected rooms, and keep airflow strong. If contamination, mold, or wiring issues exist, you shouldn’t remain there.
What Signs Show Hidden Water Damage Remains?
Like a silent tide, hidden damage lingers when you notice musty odors, peeling paint, warped floors, discoloration, or soft walls. You should watch for mold growth and compromised structural integrity, and you’re not alone here.
Review
When you act fast, you don’t just clean up water you protect what matters most. Stop the source, remove the standing water, and dry every hidden space before damage spreads. Then, disinfect, salvage, and watch closely for mold. The real threat often stays unseen, waiting in walls and floors. If you stay methodical now, you’ll avoid costly repairs later and keep your space safe, stable, and ready for what comes next.