
When sudden inundation hits, you need to stop the water source, cut power if it’s safe, and secure the area fast. Emergency Mitigation Repair then moves into extraction, drying, and material removal before mold takes hold. But the visible water is only part of the problem, and hidden damage can keep spreading long after the surface looks clear.
Key Takeaways
- Shut off water and electricity immediately, then secure the area to prevent electrical shock and structural hazards.
- Start emergency water extraction quickly, using pumps suited to the water depth, debris, and access conditions.
- Dry walls, floors, and cavities with strong airflow and dehumidification while monitoring moisture until materials are fully dry.
- Remove wet drywall, insulation, and porous debris promptly, then clean and sanitize exposed surfaces with EPA-registered products.
- Control humidity, inspect hidden dampness, and use HEPA filtration to reduce mold growth and contamination risk.
Stop the Water and Make the Area Safe
First, shut off the water at the nearest valve or main supply, then cut power to any affected circuits if flooding has reached outlets, appliances, or wiring. You need to stop the source fast and protect everyone in the space.
Move others out of the wet area, mark hazards, and keep access clear for your team. Follow your safety protocols without delay, and use gloves and boots if you must cross damp flooring.
If you can do so safely, place water barriers to redirect flow and limit spread. Check for structural instability, slipping surfaces, and hidden electrical danger before you re-enter.
Act with discipline, communicate clearly, and stay aligned with the group’s emergency plan so you all reduce risk and control the scene.
Start Emergency Water Extraction
Begin emergency water extraction as soon as the scene is safe and the power is isolated. You need to move fast, because standing water drives damage and contamination.
Choose pump selection based on depth, debris load, and access: use a submersible pump for lower water, a trash pump for heavy sediment, and a wet vac for tight areas.
Work from the lowest point outward so you don’t trap water. Apply extraction techniques in passes, checking hoses, filters, and discharge paths before each run.
Keep your footing secure, monitor rising pressure, and pause if conditions change. You’re not doing this alone; your team relies on disciplined, coordinated action.
Clear, decisive extraction helps everyone protect the structure, reduce losses, and regain control quickly.
Dry Walls, Floors, and Structural Cavities
You need to dry wall assemblies quickly with controlled airflow, dehumidification, and targeted heat so moisture doesn’t migrate deeper into the structure.
You’ll also remove water from floors and structural cavities using extraction, air movement, and cavity-drying tools to stop trapped moisture and hidden damage.
Monitor moisture levels continuously and keep drying until materials return to acceptable dry standards.
Wall Drying Methods
Wall drying must start as soon as floodwater is removed, because trapped moisture in drywall, subfloors, and wall cavities can drive mold growth, structural deterioration, and hidden damage.
You should open affected walls where needed, then use targeted ventilation techniques to move dry air across exposed surfaces. Pair that with moisture detection so you can verify readings, map wet zones, and confirm when materials are actually drying.
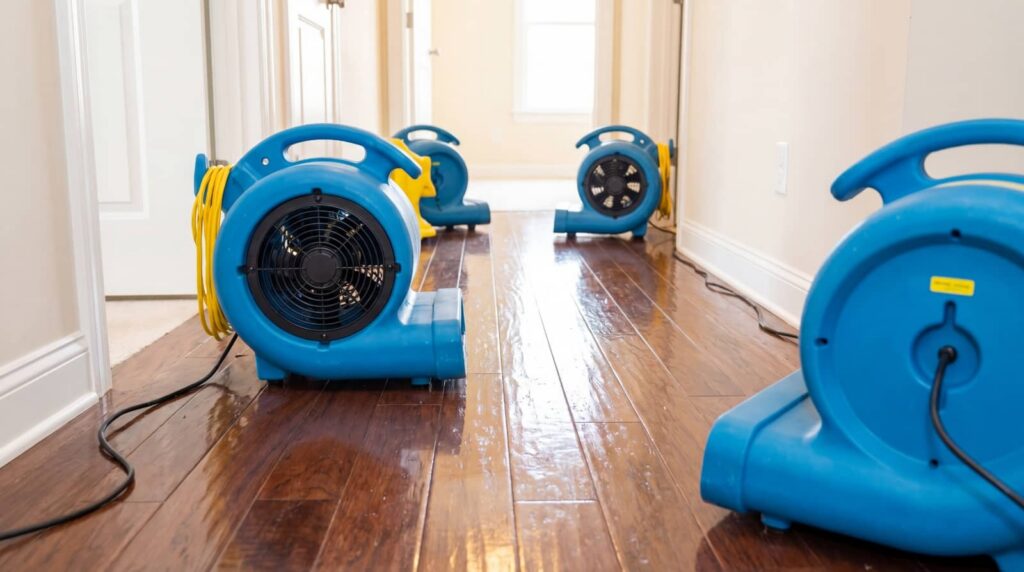
Keep air movers positioned to promote circulation, and run dehumidifiers to lower indoor humidity fast.
Inspect framing, insulation, and backing material at regular intervals, because hidden dampness can persist after surfaces look dry.
Stay coordinated with your mitigation team, follow documented drying targets, and don’t close walls until measurements show safe moisture levels throughout the assembly.
Floor And Cavity Drying
Floor and cavity drying needs to start immediately after water extraction to stop moisture from migrating into subfloors, wall bases, and concealed cavities.
You’ll deploy high-velocity air movers along floor seams, base plates, and toe-kick openings while dehumidifiers control ambient vapor.
Lift carpet, pad, and trim as needed so air can reach hidden pockets.
Monitor moisture measurement at set intervals using calibrated meters, comparing readings in framing, underlayment, and cavity insulation.
If readings stall, increase airflow or create targeted access points to improve exchange.
You’re part of the recovery team, so document every change, verify drying targets, and protect adjacent finishes from rewetting.
Fast, disciplined cavity drying reduces microbial risk, preserves structure, and gets your space back to safe, serviceable condition sooner.
Remove Wet Materials Before Mold Starts
Pull wet drywall, insulation, carpet, padding, and any porous debris as soon as possible, before mold has a chance to establish. Your mold prevention window is short, so move fast with wet material removal and don’t leave saturated components in place.
You protect the crew’s shared workspace when you strip out materials that trap moisture and feed growth.
- Bag debris immediately to limit handling time.
- Cut back beyond the visible water line.
- Remove baseboards if they’re swollen or damp.
- Separate salvageable items from porous losses.
Work methodically, verify hidden pockets behind trim, and keep your team aligned on removal priorities. The faster you clear wet materials, the sooner you reduce risk and stabilize the structure for the next phase.
Clean and Disinfect the Flooded Area
Once you’ve removed the saturated materials, clean every exposed surface to strip away silt, sewage residue, and other contaminants before they dry in place.
Use warm water and a detergent solution, working from the cleanest area toward the dirtiest so you don’t spread contamination. Rinse thoroughly, then apply approved disinfecting techniques at the labeled dilution and contact time.
Wear gloves, eye protection, and a respirator if needed; your flood safety comes first. Change cloths, mop heads, and buckets often to avoid recontamination.
Keep doors and windows open for ventilation, and never mix chemicals. If you’re working alongside neighbors, coordinate tasks so everyone follows the same sanitation plan.
Clean tools and hands after each zone, then dispose of waste promptly and safely.
Inspect for Structural, Electrical, and Mold Damage
Before you rebuild, inspect the structure for warping, cracking, sagging, or shifted supports, and don’t enter any area that looks unstable. You’re protecting everyone’s safety by confirming structural integrity before cleanup continues.
Check walls, floors, and ceilings for movement, then document every issue for accurate damage assessment. Shut off power at the main panel if water reached outlets, fixtures, or appliances, and verify electrical safety before restoring service.
Look for damp insulation, stained drywall, and musty odors, because early mold prevention starts now.
- Measure visible deflection in beams and joists.
- Test outlets only after a qualified check.
- Photograph damage before removal or drying.
- Isolate contaminated spaces to protect your crew.
Move fast, stay organized, and keep your team aligned.
Repair Hidden Flood Damage
After the visible water is gone, you still need to open up walls, floors, and cavities to find trapped moisture, saturated insulation, and damaged framing that can keep spreading rot and mold.
You’ll use inspection techniques like moisture mapping, thermal imaging, and probe checks to locate hidden damages before they worsen. Cut back drywall, lift select flooring, and expose base plates so you can verify what’s salvageable and what’s not.
Remove wet insulation, warped trim, and compromised underlayment right away. Dry framing with directed airflow and dehumidification, then measure again until readings stabilize.
Seal any remaining openings to limit dust and cross-contamination. When you act fast and methodically, you protect your crew, your property, and the people who count on this space.
Restore the Flooded Space
You’ll need to extract standing water immediately to stop further structural damage and limit contamination spread.
Next, you should dry the affected space with controlled airflow and dehumidification until moisture readings return to safe levels.
Finish by sanitizing all impacted surfaces and materials to reduce microbial growth and restore a safe environment.
Water Extraction
Once the source of intrusion is controlled, remove standing water immediately to stop further saturation and limit secondary damage. You should deploy pumping techniques matched to depth, debris load, and access, then move water toward approved drainage solutions.
Work from the perimeter inward so you don’t trap pockets under flooring or in low channels. If the area is shared, coordinate with your team so everyone stays clear of energized equipment and unstable surfaces.
- Set intake screens to block solids.
- Use submersible pumps in deeper zones.
- Squeegee residual water into collection points.
- Confirm discharge routes won’t backflow.
Track extraction progress by zone, and keep paths open for fast equipment movement. Act now, because every minute of delay increases structural stress and recovery costs.
Drying And Sanitizing
With standing water removed, start drying the structure immediately to halt hidden moisture migration and prevent mold growth, corrosion, and material breakdown.
You’ll protect wall cavities, subfloors, and insulation by moving air aggressively and controlling humidity. Select equipment based on moisture load: dehumidifiers for vapor removal, air movers for surface evaporation, and HEPA filtration if contaminants are present.
Monitor readings daily, because moisture can linger behind trim and inside framing.
For sanitizing, apply EPA-registered cleaners to all affected hard surfaces after you’ve confirmed they’re dry enough for treatment.
Focus on mold prevention by removing residues, drying every accessible void, and discarding porous materials that won’t recover.
Work methodically, stay alert, and follow the same disciplined process your mitigation team relies on.
Frequently Asked Questions
How Long Does Emergency Mitigation Repair Usually Take?
You’ll usually see emergency mitigation repair take 1–7 days, depending on damage assessment, drying, and repairs. Your repair timelines can extend if water intrusion is severe, but quick action helps you protect your space together.
Can I Stay in My Home During Flood Repairs?
You may stay if your home evaluation confirms flood safety, utilities work, and crews isolate work zones. If you smell mold, see contamination, or lack power, you shouldn’t remain; leave immediately for your protection.
Will My Insurance Cover Sudden Inundation Damage?
Yes—your policy may cover sudden inundation damage if you’ve got flood insurance, but coverage limits apply. For example, a burst levee could trigger payment, yet you’ll need prompt documentation and fast claims action.
What Items Should Be Saved Versus Discarded After Flooding?
Save nonporous items, sealed documents, and salvageable electronics after inspection; discard soaked drywall, insulation, carpets, mattresses, and food. Your restoration priorities are safety, contamination control, and drying. You’ll reduce flood damage and protect your community quickly.
When Should a Professional Plumber Be Called?
Call a professional plumber when you spot plumbing signs like low pressure, leaks, or backups; water damage spreads like wildfire. You’ll protect your home, and you’ll stay in the loop with your crew.
Summary
When sudden inundation hits, you need to act fast and in the right order. Shut off hazards, extract water, dry the structure, and remove saturated materials before mold can take hold. Clean and disinfect every impacted surface, then inspect for hidden structural, electrical, and microbial damage. Monitor moisture until readings stabilize. Think of the repair process as a controlled triage: every minute counts, and each step protects your building’s recovery.