
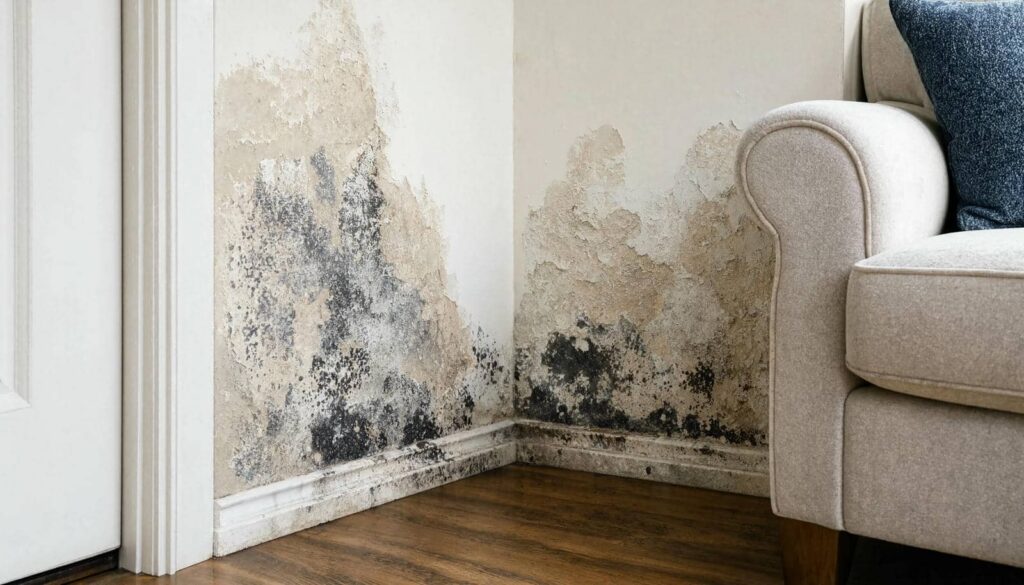
Emergency Mold Prevention begins the moment water damage occurs because mold can start growing within 24 to 48 hours. You need to stop the water source, remove standing water, and dry affected materials as quickly as possible to reduce the risk of contamination. Hidden moisture, poor airflow, and delayed cleanup can turn a small water loss into a much larger problem. Taking the right steps early helps control the damage before mold has a chance to spread.
Key Takeaways
- Shut off the water source immediately to stop further flooding and inspect for hidden leaks.
- Remove standing water quickly with pumps, wet vacs, or buckets, then dry porous materials within 24 hours.
- Run fans and dehumidifiers, and keep humidity below 60% to prevent mold growth.
- Clean affected surfaces with gloves and an EPA-registered mold disinfectant, following safety and ventilation guidelines.
- Check hidden areas for moisture, then dry and salvage items like textiles and hard surfaces separately.
Stop the Water Source
The first priority is to stop the water source immediately, because mold can begin growing within 24 to 48 hours of moisture exposure. You should shut off the main supply valve if a pipe, appliance, or fixture is failing.
If the source is hidden, use water detection tools or call a qualified technician to identify the breach fast. Protect your space by checking ceilings, walls, and under sinks for active dripping, then isolate the affected area.
If you’re part of a home or facility team, document the source and verify that leak prevention measures are working before reopening the area. Acting decisively now helps you preserve a safe environment and keeps your household or crew aligned on the same emergency response.
Remove Standing Water
Scoop, pump, or vacuum out all standing water as quickly as possible, because pooled moisture accelerates mold growth and damages porous materials. You need to remove every visible puddle from floors, basins, and low spots so water damage doesn’t spread. Act like your team depends on your speed, because it does.
- Clear access to the flooded area.
- Use a wet vacuum, pump, or buckets.
- Check hidden corners, seams, and under fixtures.
- Dispose of collected water safely.
When you leave standing water behind, you give mold growth a head start and weaken surfaces you care about. You’re not alone in this response; reliable cleanup protects your space, your people, and your sense of control.
Work methodically, document affected areas, and keep moving until the area’s visibly dry.
Dry Wet Materials Within 24 Hours
You need to remove moisture fast, because mold can begin colonizing damp surfaces within 24 hours.
Dry porous materials such as drywall, insulation, carpeting, and upholstery immediately, since they absorb water and retain it longer than nonporous surfaces.
Use directed airflow, dehumidification, and replacement of unsalvageable materials to keep residual moisture below mold-supporting levels.
Remove Moisture Quickly
Act fast to remove moisture before mold can take hold; dry wet materials within 24 hours whenever possible, and prioritize porous items like drywall, insulation, carpeting, and upholstery because they absorb water quickly and can support growth if they stay damp.
You’re not alone—your team can limit damage with disciplined humidity control and intact moisture barriers.
- Shut off the source immediately.
- Extract standing water with pumps or wet vacs.
- Run dehumidifiers and fans continuously.
- Monitor surfaces until readings drop to safe levels.
Inspect hidden areas, including behind baseboards and inside cavities, because trapped moisture lingers.
Act with urgency, document conditions, and maintain airflow.
When you respond quickly, you protect shared spaces, reduce repair costs, and keep your environment stable, healthy, and ready for recovery.
Dry Porous Materials
Porous materials need immediate attention because they absorb water fast and hold it deep inside their structure. You should dry drywall, insulation, carpet padding, ceiling tile, and untreated wood within 24 hours to limit colonization.
Remove standing water, then increase airflow with fans and dehumidifiers, keeping the space below 60% relative humidity. If you can safely do so, detach wet sections and separate them so hidden moisture can escape.
Inspect for swelling, staining, and odor, since these signal retained water. Replace items that won’t dry cleanly with mold resistant materials. For salvageable components, apply porous material treatment only after they’re fully dry and uncontaminated.
You’re protecting your home and your team when you act fast, document conditions, and monitor daily until materials stabilize.
Open Windows for Better Airflow
When weather conditions allow, open windows to increase cross-ventilation and reduce indoor humidity, which helps slow mold growth after a water intrusion.
You should pair this with disciplined air circulation techniques: open opposite windows, clear obstructions, and keep interior doors ajar so air can move through shared spaces.
Check window maintenance before you start; cracked seals, broken latches, or stuck sashes can limit airflow and leave you exposed to damp pockets.
Follow these steps:
- Verify outdoor air is dry and safe.
- Open windows on opposing walls.
- Monitor humid rooms closely.
- Close them if rain starts.
You’re not alone in this cleanup—each smart choice protects your home and helps your household regain control with confidence.
Run Dehumidifiers and Fans
Place dehumidifiers where they can pull the most moisture from the affected area, and aim fans to create crossflow that pushes damp air out rather than recirculating it.
You should keep equipment running continuously until indoor relative humidity drops to a safe range and surfaces are fully dry.
Start this drying process as soon as possible, because early moisture control sharply reduces mold growth potential.
Strategic Airflow Placement
To slow mold growth after water intrusion, you need to move humid air out and dry affected materials fast by placing dehumidifiers and fans strategically.
You should map airflow dynamics so each fan pushes moisture toward the dehumidifier, not into dead corners. Use ventilation strategies that create a clear intake-to-exhaust path, and keep units off walls to widen circulation. Your setup should feel deliberate, because precision protects the space you share.
- Aim fans across wet surfaces, not directly into soaked cavities.
- Center the dehumidifier in the driest practical airflow lane.
- Open interior doors to connect rooms and unify drying.
- Recheck for stagnant pockets, then adjust positions immediately.
When you work this way, you join a prepared group that acts fast and prevents hidden mold.
Moisture Control Timing
Once airflow is set, timing decides whether you stop mold or feed it. You need to run dehumidifiers and fans immediately after water intrusion, not after surfaces feel dry.
Start moisture monitoring at once, then track humidity levels every few hours. Keep dehumidifiers centered in the affected zone and set fans to move air across wet materials, not directly into untouched rooms.
Shut doors to isolate the area, but leave pathways for circulation. If humidity levels stay above 60%, keep equipment running. Replace damp filters, empty reservoirs, and check hidden cavities, because trapped moisture keeps microbes active.
You belong to the group that acts fast: disciplined timing cuts drying time, protects materials, and reduces the chance that a small leak becomes a mold problem.
Remove Wet Carpets and Padding
Pull up wet carpets and remove the padding underneath as soon as possible, because trapped moisture creates ideal conditions for mold growth within hours. You protect your space when you act fast and stay methodical.
Cut the carpet into manageable sections, roll them face inward, and move them outside for carpet disposal if they can’t be fully dried within 24 hours. Replace saturated padding; padding replacement is usually the only reliable option after contamination.
Follow this sequence:
- Wear gloves and a respirator.
- Lift carpet edges carefully.
- Remove and discard soaked padding.
- Transport materials offsite immediately.
You’re not just cleaning; you’re preserving a healthy home for everyone who belongs there.
Avoid stretching damp carpet back in place, because it can trap hidden moisture and spread damage.
Clean and Disinfect Affected Surfaces
After you remove wet materials, clean all affected hard surfaces with detergent and water to lift residue and visible growth.
Then apply an EPA-registered disinfectant that’s compatible with the surface and follow the label’s contact time exactly.
Once you finish, dry the area completely with ventilation or dehumidification to prevent any remaining moisture from supporting mold regrowth.
Surface Cleaning Steps
Before you scrub, put on gloves, a mask, and eye protection, then remove any loose debris with paper towels or a damp cloth. You’ll protect yourself and keep contamination from spreading across surface materials.
Use cleaning techniques matched to the finish, and work from the outer edge inward so you don’t push residue deeper.
- Dampen the area, don’t saturate it.
- Scrub with a nonabrasive cloth using firm, overlapping strokes.
- Rinse the surface with clean water and wipe dry.
- Recheck corners, seams, and hidden edges for remaining film.
If you stay methodical, you’ll help your team maintain a safer space and reduce the chance that mold returns.
Clean tools after each room, and discard disposable materials promptly.
Safe Disinfectant Choices
Choose a disinfectant that’s labeled for the surface and effective against mold, then mix and apply it exactly as directed on the product label.
You should verify compatibility before treating wood, tile, drywall, or painted finishes, because the wrong chemical can damage materials and reduce trust in your cleanup process.
Follow chemical safety guidelines: wear gloves, keep the area ventilated, and never combine products.
If you prefer natural disinfectant options, use them only when the label or manufacturer confirms mold efficacy; otherwise, they may leave viable growth behind.
Apply the solution uniformly, allowing full contact time so the disinfectant can work as intended.
Stay consistent and deliberate, and you’ll protect your space with the same standards careful professionals use.
Drying After Cleaning
Once you’ve cleaned and disinfected the affected surface, dry it completely to prevent mold from returning. Use clean towels, fans, and dehumidifiers to remove moisture fast; lingering dampness fuels mold growth. Your cleaning techniques work only when you finish the job with disciplined drying.
Stay with your crew in this step:
- Wipe visible water from seams, corners, and porous edges.
- Run airflow across the surface until it feels fully dry.
- Check hidden gaps with a flashlight and touch test.
- Keep humidity below 60% for 24 hours.
When you dry thoroughly, you protect your space and reinforce a reliable, prepared community. Quick, exact drying reduces risk, supports recovery, and helps everyone return to a safer environment together.
Check Hidden Areas for Moisture
Inspect hidden areas for moisture immediately after a water event, because damp conditions behind walls, under sinks, inside cabinets, and beneath flooring can support mold growth before visible damage appears.
You should use inspection techniques that expose hidden moisture: touch baseboards, check drywall seams, and shine a flashlight into corners, utility chases, and cabinet backs.
If you notice swelling, staining, or a musty odor, treat the area as active risk and keep monitoring it closely. You’re not alone in this process; careful checks help your whole team protect the space.
Use a moisture meter if you have one, and document readings so you can compare changes over time. Fast identification matters, since dry surfaces can still conceal trapped water that keeps mold developing quietly.
Save Salvageable Items Safely
If items got wet, sort them quickly and separate what you can dry and disinfect from what you can’t safely save. Use item assessment to rank each object by material, porosity, and contamination risk. Keep your team-like rhythm steady: every minute matters.
- Wipe hard surfaces with clean cloths.
- Air-dry textiles in moving air.
- Bag damp paper separately for review.
- Label storage solutions so dry items stay isolated.
Move saved items to a clean, dry zone with low humidity. Avoid stacking, which traps moisture and invites odor. Use breathable containers, not sealed bins, until every item reaches stable dryness.
Check seams, joints, and hidden layers for lingering dampness. When you act methodically, you protect both value and belonging, and you keep recovery organized instead of chaotic.
Call a Mold Cleanup Pro If Needed
When moisture has spread beyond a small, easy-to-clean area, bring in a mold cleanup professional. You’ll protect your home and your people by acting early, before colonies penetrate drywall, insulation, or subflooring.
Use mold inspection tips to note musty odor, visible growth, warped materials, and repeated leaks, then document the affected zones. A professional assessment can determine contamination depth, identify hidden moisture, and separate cleanup from structural repair.
If the crew recommends containment, HEPA filtration, or demolition, follow that plan without delay. You don’t need to manage every hazard alone; you need a safe, coordinated response.
Trust qualified specialists to reduce exposure, restore conditions, and help you rejoin a healthy indoor environment with confidence.
Frequently Asked Questions
What Mold Signs Mean Hidden Damage?
Musty odors, recurring discoloration, and warping often mean hidden damage. You should inspect hidden leaks, moisture sources, and damp cavities, because mold there signals trapped water, structural decay, and conditions that’ll keep spreading unnoticed.
How Soon Can Mold Start After Flooding?
Mold can start within 24 to 48 hours after flooding, so your flood response must be immediate. You’ll limit mold growth by drying materials fast, removing wet items, and controlling humidity before spores settle.
Can Insurance Cover Emergency Mold Cleanup?
Yes—your policy can cover emergency mold cleanup if mold insurance coverage applies to the cause, like sudden water damage. You’ll still need to verify exclusions, limits, and emergency cleanup costs with your insurer.
Should I Test Air Quality After Water Damage?
Yes—test the air quality after water damage; it’s your first compass in a storm. You’ll confirm post damage testing, spot hidden contaminants, and protect your space. Don’t guess; verify before you breathe easier.
What Health Symptoms Suggest Mold Exposure?
You may notice sneezing, coughing, wheezing, itchy eyes, congestion, headaches, or skin irritation; these mold allergies and respiratory issues often worsen indoors, especially after dampness. You should seek evaluation if symptoms persist or intensify.
Summary
When you stop the water, remove the standing water, and dry everything fast, you cut mold off before it can take hold. But don’t assume the visible damage is the whole problem—moisture can hide in walls, under flooring, and inside materials. Keep checking humidity, inspect concealed spaces, and act on any dampness immediately. If the growth spreads or you can’t fully dry the area, call a mold cleanup pro before the damage escalates.