When it comes to mold remediation, understanding the critical techniques is vital for effective management. You’ll need to identify moisture sources, contain affected areas, and clean surfaces thoroughly. Proper moisture control and dehumidification play pivotal roles in preventing mold growth. However, each situation may require specific strategies to guarantee safety and efficacy. Let’s explore these techniques in detail to uncover the best practices for a mold-free environment.
Key Takeaways
- Identify and monitor moisture sources to prevent mold growth, addressing leaks and maintaining humidity levels between 30% and 50%.
- Contain and remove affected areas using barriers and negative air pressure to prevent mold spores from spreading.
- Clean and disinfect surfaces with mold-resistant products, ensuring thorough sanitization after visible mold removal.
- Dry and dehumidify the environment using fans, dehumidifiers, and natural airflow to reduce moisture levels below 60%.
- Seek professional assistance for comprehensive mold assessment and compliance with health regulations when dealing with extensive mold issues.
Identifying the Source of Moisture
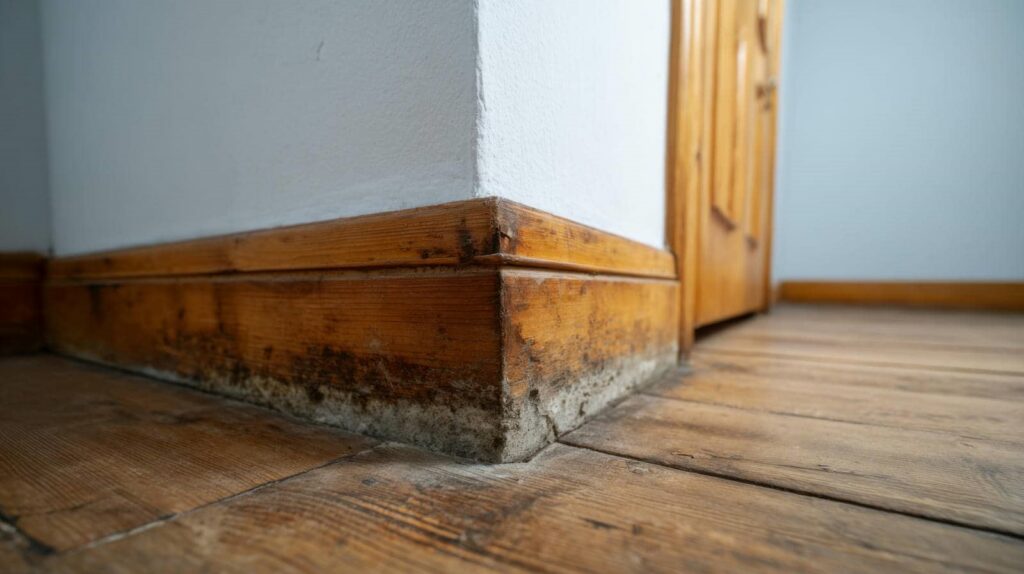
To effectively tackle mold remediation, you must first identify the source of moisture, as this is often the root cause of mold growth. Common moisture sources include leaks from roofs, pipes, or windows, as well as condensation from inadequate ventilation.
Start by inspecting areas prone to dampness, such as basements, bathrooms, and kitchens. Use a moisture meter to detect hidden moisture levels in walls and floors.
Humidity control is essential in preventing mold recurrence. Aim to maintain indoor humidity levels between 30% and 50%. You can achieve this with dehumidifiers and proper ventilation.
Regularly check for signs of water damage and promptly address any leaks or structural issues. By understanding and managing moisture sources, you create an environment less conducive to mold growth, fostering a healthier space for you and your loved ones.
Containing the Affected Area
To effectively contain the affected area, you need to establish containment barriers that prevent mold spores from spreading.
Utilizing negative air pressure will help guarantee that airborne contaminants are drawn into a filtration system rather than escaping into unaffected spaces.
Additionally, sealing off your HVAC systems is essential to avoid further contamination through air ducts.
Establishing Containment Barriers
When you encounter mold in your home, establishing containment barriers is crucial to prevent its spread. By doing so, you protect your air quality and limit exposure to harmful mold spores.
Here are three key steps to establish effective containment:
Seal off affected areas: Use plastic sheeting to cover doorways and vents, guaranteeing no spores escape.
Create a negative pressure zone: This helps keep mold spores contained within the work area, though we won’t discuss this technique in detail now.
Use proper signage: Clearly mark contaminated areas to keep family members and pets away.
Following these steps guarantees a controlled environment for remediation, ultimately reducing health risks and fostering a safe, mold-free home.
Utilizing Negative Air Pressure
Establishing containment barriers sets the stage for effective mold remediation, and utilizing negative air pressure further enhances your efforts. By creating negative pressure within the affected area, you prevent mold spores from escaping into unaffected spaces.
This technique involves using high-efficiency particulate air (HEPA) filters to guarantee that air filtration is ideal, capturing even the smallest particles.
To achieve negative pressure, you can use air scrubbers that draw air out of the space while exhausting it outside, maintaining a lower pressure inside. This approach not only protects your living environment but also promotes a safer working space for remediation professionals.
Adopting negative pressure is an essential step in confirming that your mold remediation process is thorough and successful.
Sealing Off HVAC Systems
Before you begin mold remediation, sealing off your HVAC systems is essential to containing the affected area. Proper sealing prevents mold spores from spreading throughout your home, guaranteeing a more effective cleanup.
Here are three critical steps to follow:
Turn Off the HVAC System: Confirm the system is completely powered down to avoid circulating air that may contain mold spores.
Seal Vents and Registers: Use plastic sheeting and tape to cover all vents and registers in the affected area, enhancing air filtration and containment.
Perform HVAC Maintenance: Schedule an inspection and cleaning post-remediation to eliminate any remaining spores and maintain air quality.
Removing Damaged Materials
To effectively remove damaged materials, you need to first identify all affected areas in your space.
Once you’ve pinpointed these locations, it’s essential to dispose of any contaminated materials properly to prevent further mold growth.
This step not only clears the area but also sets the stage for successful remediation.
Identify Affected Areas
When dealing with mold remediation, identifying affected areas is essential, as it often involves removing damaged materials to prevent further contamination.
Start with effective visual inspection techniques and mold identification methods to assess the extent of the problem. Here are three steps to guide you:
Inspect surfaces: Look for discoloration, warping, or a musty odor that indicates mold presence.
Check hidden areas: Don’t forget to examine behind walls, under carpets, and in attics or basements where moisture can accumulate.
Evaluate air quality: Use air sampling to detect mold spores in the environment, which can help pinpoint affected zones.
Dispose of Contaminated Materials
After identifying the affected areas, it’s important to systematically dispose of contaminated materials to halt mold growth and prevent further spread.
Begin by wearing protective gear, including gloves and masks, to guarantee contaminated material safety. Use appropriate mold disposal methods, such as sealing materials in plastic bags before removal. This action not only contains mold spores but also minimizes cross-contamination.
Items like drywall, carpet, and insulation that are heavily infested should be replaced entirely. Dispose of these materials according to local regulations to guarantee safe handling.
Cleaning and Disinfecting Surfaces
Cleaning and disinfecting surfaces is essential in mold remediation, as it directly impacts the effectiveness of the entire process.
When you tackle mold, you need to guarantee that all surfaces are thoroughly sanitized to prevent future growth. Here are three key steps to follow:
Use Mold Resistant Products: Opt for cleaning agents specifically designed to combat mold. These products not only eliminate existing spores but also help inhibit future growth.
Surface Sanitization: After removing visible mold, sanitize the surfaces to kill any remaining spores. Pay special attention to porous materials, as they can harbor mold.
Regular Maintenance: Establish a routine cleaning schedule. Regularly cleaning and disinfecting surfaces will keep mold at bay and maintain a healthy environment.
Drying and Dehumidifying
Effective mold remediation doesn’t stop at cleaning and disinfecting surfaces; drying and dehumidifying play a critical role in preventing mold from returning. To achieve moisture control, you need to thoroughly dry affected areas.
Start by using fans and dehumidifiers to enhance air circulation, ensuring that moisture is effectively removed from surfaces and the air. Target any hidden sources of dampness, such as behind walls or under floors, as these areas can harbor mold spores.
Monitor humidity levels, aiming to keep them below 60%. If possible, open windows and doors to promote natural airflow, which can greatly aid the drying process.
For persistent moisture issues, consider installing permanent dehumidifiers. By prioritizing drying and dehumidifying, you not only eliminate existing mold but also create an environment that’s less favorable for future growth.
This proactive approach fosters a healthier living space, reinforcing the importance of moisture management in mold remediation.
Preventing Future Mold Growth
To effectively prevent future mold growth, it’s essential to address potential moisture issues before they arise.
You can take proactive steps to safeguard your environment by implementing the following strategies:
Use Mold Resistant Materials: When building or renovating, opt for mold-resistant drywall, paint, and insulation. These materials greatly reduce the risk of mold development.
Conduct Regular Inspections: Schedule routine inspections of areas prone to moisture, such as basements, bathrooms, and kitchens. Early detection can prevent larger mold problems down the line.
Control Humidity Levels: Keep indoor humidity levels below 60% by using dehumidifiers and ensuring proper ventilation, especially in high-moisture areas.
Frequently Asked Questions
What Are the Health Risks Associated With Mold Exposure?
Mold exposure can lead to various health risks, including respiratory problems, allergic reactions, and skin irritations. Different mold types may trigger specific exposure symptoms, so it is crucial to identify and address any mold issues promptly.
How Can I Tell if Mold Is Toxic?
Around 50% of homes have mold. To identify toxic mold, use mold identification methods like visual inspections and air sampling. Watch for toxic mold symptoms such as coughing, headaches, or skin irritation to protect your health.
Can I Perform Mold Remediation Myself?
Yes, you can perform DIY mold remediation using appropriate tools. Make certain you wear protective gear, use effective remediation tools like HEPA vacuums, and follow guidelines to prevent further contamination and safeguard your health.
How Long Does Mold Remediation Typically Take?
Mold remediation typically takes one to five days, depending on various time factors like the extent of contamination and chosen remediation methods. Your careful approach guarantees effective removal, promoting a healthier environment for you and your loved ones.
Is Mold Remediation Covered by Homeowners Insurance?
You’ll find that mold coverage varies markedly among insurance policies. Some may cover remediation costs if mold results from a covered event, while others exclude it entirely. Always check your policy details for clarity.
Final Thoughts
By mastering these top mold remediation techniques, you’re not just fighting a stubborn invader; you’re reclaiming your space and breathing easier. Identifying moisture sources acts like shining a flashlight in the dark, while containment barriers serve as shields against spreading spores. Cleaning surfaces and drying the area are your final strokes in this battle. With diligent prevention measures, you’ll build a fortress against future mold, ensuring a healthier environment for you and your loved ones.