When faced with water damage in your home, it’s essential to act swiftly and methodically. Start by evaluating the water extraction situation to identify hazards and ensure safety. Next, you’ll need to shut off utilities to prevent further complications. Efficiently removing standing water is critical, but how you approach the drying and sanitizing process can make or break your recovery efforts. Understanding these steps will help you protect your home and reduce long-term damage.
Key Takeaways
- Assess the flooding situation and ensure safety before proceeding with extraction efforts.
- Shut off utilities, including water and electricity, to prevent further hazards.
- Use submersible pumps for efficient water removal from standing water.
- Implement drying techniques with fans and dehumidifiers to reduce moisture.
- Clean and disinfect affected areas to prevent mold growth and sanitize surfaces.
Assessing the Situation and Safety Precautions
Before you begin any water extraction process, it’s crucial to assess the situation and prioritize safety. First, evaluate the extent of the flooding and identify potential hazards, such as structural damage or electrical risks.
Grab your emergency kit, ensuring it contains necessary supplies like flashlights, first-aid items, and non-perishable food. Equip yourself with appropriate safety gear, including gloves, boots, and masks, to protect against contaminants and slippery surfaces.
Next, check for any trapped individuals or pets, and confirm everyone’s safety before proceeding. If conditions are unsafe, wait for professional help. Your safety is paramount, and taking these precautions fosters a sense of security within your community.
Shutting Off Utilities and Electrical Systems
As you prepare to begin the water extraction process, shutting off utilities and electrical systems is vital to prevent further damage and ensure safety.
Start by locating your main water shut-off valve and turning it off to stop any additional water flow. Next, switch off the electricity at the main circuit breaker. This step is critical for utility safety, as standing water poses significant electrical hazards.
Make certain to wear rubber-soled shoes and avoid contact with wet surfaces while you perform these tasks. If you smell gas or suspect a gas leak, evacuate immediately and contact your gas company.
Once utilities are shut off, inform your family or household members to make sure everyone stays safe. By taking these proactive steps, you’re protecting your home and fostering a secure environment for your loved ones.
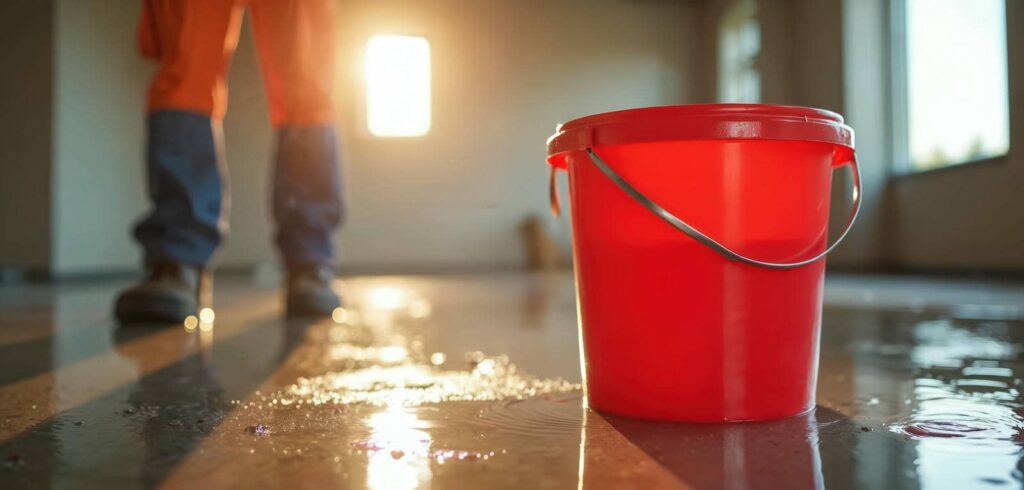
Removing Standing Water
Once you’ve confirmed the area is safe, start removing standing water promptly to minimize damage and prevent mold growth.
Begin by gathering appropriate pumping equipment, such as submersible pumps, to efficiently extract water. Position the pump in the deepest area of standing water and connect it to a discharge hose leading away from your home.
As you activate the pump, monitor its performance to ensure effective water removal. If the water level is shallow, utilize a wet/dry vacuum for the final cleanup, ensuring every last drop is extracted.
Work methodically, moving furniture and other items to prevent further water exposure. Check for hidden pockets of water, especially in corners and behind appliances.
Once you’ve removed the majority of the standing water, prepare for the next steps in the water extraction process. Your diligence now will greatly impact the restoration of your home.
Drying and Dehumidifying Affected Areas
After removing standing water, your next priority is to ensure proper drying and dehumidifying of the affected areas.
Effective airflow is essential; it helps evaporate moisture quickly and prevents mold growth.
Additionally, using dehumidifiers can greatly lower humidity levels, enhancing the drying process and safeguarding your space.
Importance of Airflow
Effective airflow is essential for drying and dehumidifying areas affected by water damage, since stagnant air can lead to prolonged moisture retention and promote mold growth.
To combat this, you should implement efficient airflow techniques and robust ventilation strategies. Start by opening windows and doors to encourage cross-ventilation. Utilize fans to increase air movement, directing them towards damp areas.
Consider employing exhaust fans in confined spaces to expedite moisture removal. If possible, position fans at strategic angles to enhance air circulation.
Regularly monitor humidity levels using a hygrometer, adjusting your strategies as needed. By prioritizing airflow, you’ll markedly reduce drying time and create a healthier environment, fostering a sense of community among those dealing with similar challenges.
Dehumidifier Usage Tips
While using a dehumidifier might seem straightforward, understanding the specific settings and placement can greatly enhance its effectiveness in drying and dehumidifying affected areas.
Position your dehumidifier in the center of the room, ensuring it’s at least six inches away from walls and furniture for ideal airflow. Set it to the correct humidity level, ideally between 30-60%, to prevent mold growth and promote efficient drying.
Regular dehumidifier maintenance is essential; clean the filter monthly to maintain airflow and check the water reservoir frequently to avoid overflow.
Additionally, run the unit continuously in the initial drying phase to expedite the process. By following these tips, you’ll create a welcoming, dry environment for your home and loved ones.
Cleaning and Sanitizing Surfaces
Once water extraction is complete, you must focus on cleaning and sanitizing surfaces to prevent mold growth and ensure a safe environment.
Start by gathering appropriate cleaning techniques and surface disinfectants to effectively eliminate contaminants. Use a mixture of warm water and mild detergent for initial cleaning, focusing on high-touch areas like doorknobs, light switches, and countertops.
After cleaning, apply surface disinfectants according to the manufacturer’s instructions, ensuring you cover all affected areas. Allow the disinfectant to sit for the recommended dwell time to maximize effectiveness.
Don’t forget to wear protective gear, such as gloves and masks, during this process to safeguard your health.
Finally, thoroughly rinse and dry surfaces to avoid any residual moisture, as dampness can lead to mold development.
Inspecting for Structural Damage
When inspecting for structural damage, start by identifying visible cracks in walls or foundations that may indicate instability.
Next, check for warping in floors and ceilings, as this can signal significant water exposure.
Finally, assess any areas for water damage, ensuring you document findings for potential repairs.
Identify Visible Cracks
As you begin the emergency water extraction process, it’s crucial to inspect for visible cracks in the structure.
Start with a thorough foundation inspection, looking for any fissures in walls, ceilings, and floors. Pay special attention to areas where water damage is evident, as these may indicate deeper structural issues.
Use a flashlight to illuminate dark corners and identify cracks that could compromise stability. Document the size and location of each crack for future reference.
If you find significant damage, consider professional crack sealing to prevent further deterioration. Addressing these cracks early can help maintain the integrity of your home, ensuring a safe environment for you and your family during this recovery phase.
Check for Warping
After addressing any visible cracks, it’s important to check for warping throughout the structure.
Begin with a thorough moisture assessment of all wood materials. Inspect beams, floors, and walls for any signs of bending or distortion. Wood can absorb excess moisture, leading to structural compromise.
Use a level or straightedge to identify uneven surfaces. Pay close attention to door frames and window sills, as warping can affect their function.
If you notice any irregularities, document your findings and assess the extent of the damage. This proactive inspection can help prevent further deterioration and ensure your home remains structurally sound.
Taking these steps fosters a sense of safety and security within your living environment.
Assess Water Damage
Evaluating water damage is essential to understanding the extent of structural issues in your home.
Start by identifying the water source—whether it’s a burst pipe, roof leak, or flooding. Once you pinpoint the source, conduct a thorough damage assessment.
Check walls, ceilings, and floors for signs of water intrusion, such as discoloration or mold growth. Don’t forget to inspect the foundation and structural beams, as moisture can weaken these critical components.
Use a moisture meter to measure humidity levels in affected areas. This precise evaluation will help you determine necessary repairs and prioritize actions, ensuring your home remains safe and secure.
Taking these steps will foster a sense of belonging, knowing you’re protecting your sanctuary.
Preventing Future Water Issues
While addressing immediate water damage is essential, taking proactive steps to prevent future issues can save time and resources. Start by implementing effective waterproofing solutions around your home. This may involve applying sealants to walls and foundations or installing waterproof membranes.
Consider integrating moisture barriers in basements and crawl spaces to inhibit humidity and water seepage. Regularly inspect these areas for any signs of wear or damage, and address them promptly to maintain their effectiveness.
Additionally, ensure proper drainage systems are in place to redirect water away from your home. Clean gutters and downspouts regularly to prevent clogs that could lead to overflow.
Landscaping should also slope away from your foundation to minimize pooling. By taking these preventative measures, you’ll foster a safer, drier environment, reducing the likelihood of future water issues and ensuring your home remains a secure haven for you and your family.
Frequently Asked Questions
How Can I Identify the Source of the Water Intrusion?
To identify the water source, conduct a thorough intrusion detection process. Inspect plumbing fixtures, check for leaks, and examine walls or ceilings for dampness. Pay attention to unusual water stains or odors indicating hidden issues.
What Are the Health Risks Associated With Stagnant Water?
Stagnant water poses significant health hazards, including the growth of harmful bacteria and mold. You’re at risk for respiratory issues, skin infections, and other illnesses. It’s essential to address stagnant water promptly to protect your well-being.
How Long Does It Typically Take for a Home to Dry Completely?
A typical drying timeline for a home ranges from 3 to 7 days. Conducting a thorough moisture assessment helps identify damp areas, ensuring effective drying and preventing long-term damage or health hazards related to moisture.
Should I Hire a Professional or Can I Handle It Myself?
You can handle it yourself with DIY methods, but hiring professional services ensures thoroughness and expertise. Weigh your skills against potential risks; sometimes, letting experts manage the situation saves you time and stress.
What Insurance Claims Should I File After Water Damage?
You should file claims for water damage under your homeowner’s policy and flood insurance if applicable. Document damages thoroughly, gather receipts, and provide detailed descriptions to ensure you’re properly compensated for your losses.
Final Thoughts
In the face of water damage, swift action is your lifeline. By evaluating the situation and shutting off utilities, you lay the groundwork for recovery. With pumps and vacuums, you can wage war against standing water, while dehumidifiers usher in a drier future. Cleanliness becomes your armor against mold, and thorough inspections reveal hidden threats. By following these steps, you restore your home and fortify it against future floods, turning adversity into resilience.